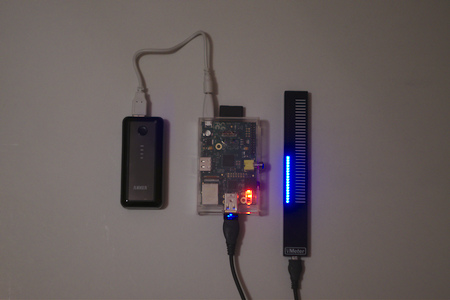
With a wlan stick, a battery pack, and Pure Data the Raspberry Pi becomes a swissarmy knife for MIDI and OSC.
In an ongoing project to make wearable non-standard musical controllers we found the vmeter which is a nicely sized touch strip with the one drawback that it is a usb device and as such wired. We looked into ways to make a wireless usb or MIDI connection or anything similar and found close to nothing that suited our needs (battery powered, small, flexible). After thinking about this for a while it occured to me that building our own system actually should take close to no hardware hacking and only a little software tinkering. So we decided to build our own. Basically a Raspberry Pi with a WLAN stick and a battery pack is all you need.
The project was featured on the adafruit blog on a PiFri-day in march 2013.
This documents what we tried. If you want to build something similar feel free to do so but we can not be made responsible for any damage, failure to deliver the expected performace or whatever. Also: Some knowledge of osc and pure data in particular is of great use here since the pd patch needs to be adjusted in many cases. Also some linux experience will make this rather straight forward for you, I guess.
Here is what one needs to do to get the Raspberry Pi (rpi for short) to act as a (wireless) MIDI to OSC (or OSC to MIDI) transmitter:
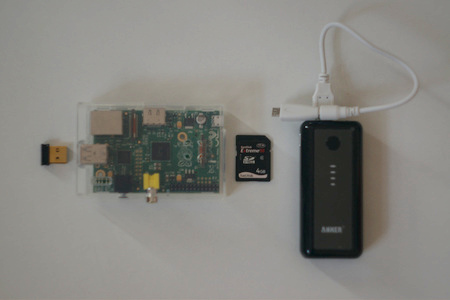
you will need

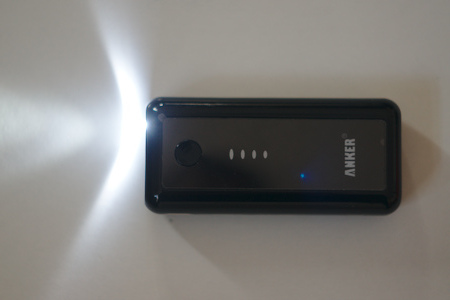
(this one can double as a LED flashlight. this might com in handy... who knows)
Temporarily you will need a usb keyboard, a usb mouse and a usb hub (to attach keyboard and mouse along with the wlan stick (model B has "only" two usb ports)) plus a Monitor or TV with either hdmi or composite input (I used a screen with dvi input and a hdmi (not micro!) to dvi adapter). A wireless LAN with internet access is assumed to be available (lateron an ad-hoc network can be used) - although the installation can be done via ethernet too (if you have Model B). After everything is set up the system should run without these. Also a 5V usb power source (like the ones to charge your phone) is usefull so that you do not have to bother about battery pack power levels during install (I used an iPad ac adaptor with a micro usb-usb cable I had lying around)...
Finally you should have a usb MIDI interface or MIDI controller you want to make wireless - we had the vmeter touch slider wireless we wanted to free from cable connections in the first place, so this is what we will assume here.
Once all this is at hand (and the rpi is save in its housing)
startx sudo dpkg -i Pd-0.43.3-extended-20121004.deb
will fail but the following sudo apt-get -f install forces to
install anyway... this seems to be due to missing jack and jack is known to fail on wheezy at the moment).Now you can start Pure Data (pd for short) by typing pd-extended in the terminal. The puredata gui should show
up. Once you have pd up and running on your rpi download this pd patch (the browser is Midori - the topmost iconon the desktop) and
open it in puredata. The pd patch midi2osc.pd is a simple one
for now. It reads from the standard midi in (you might need to set
this in the media menu in pd - also Alsa midi did not work for me) and
sends controller messages, notes, bitchbend, etc. out as OSC messages ("/midi/note", "/midi/aftertouch", "/midi/controller",etc). In order to get it to work
the connect message needs the correct ip adress and port of the
receiving computer. Also change the osc message names to taste (for the vmeter I use an even simpler patch for now: ctl2osc.pd. it just sends controller values (regardless of controller number) as a
"/vmeter" message) but a more complex setup will surely require more
elaborate naming schemes).
To make the system self contained the next step is to get to make auto login and pd-extended run on boot. You'll need to edit /etc/inittab: Open it in the nano editor (type "sudo nano /etc/inittab" in a terminal), find the line
1:2345:respawn:/sbin/getty --noclear 38400 tty1
comment it out (by adding a # in front of it), and place
1:2345:respawn:/bin/login -f pi tty1 </dev/tty1 >/dev/tty1 2>&1
just below (exit nano by ctrl-x and y). (see also here). This assumes that the default user pi should be the user running puredata (I see no reason why not). Then (logged in as pi) edit "~/.profile" (using the nano editor again typing nano ~/.profile in a terminal) and append the line
/usr/bin/pd-extended -nogui -noaudio ~/midi2osc.pd&
at the end of the file. (I actually have midi2osc.pd sitting at /usr/local/midi2osc.pd at the moment so my line is /usr/bin/pd-extended -nogui -noaudio /usr/local/midi2osc.pd&)
If you ever want to kill that process just type
killall pd-extended
with the next boot your rpi should directly log in as user pi and start pd-extended without a gui happily translating the incoming controller values into osc messages for your system of choice :)
That is it. A low-cost, wireless, completely configurable MIDI-OSC bridge.
![]()
By default the OS starts a ssh daemon so you can connect with the box wirelessly any time and say quit Pure Data and restart it with a different patch to use the rpi as a usb-MIDI to USB-MIDI converter (see below).
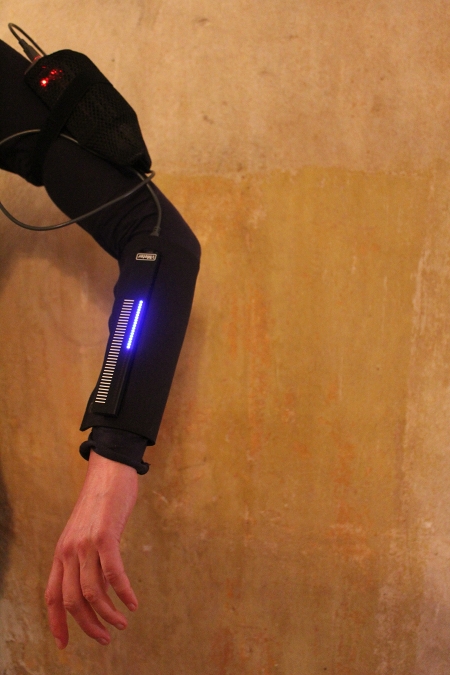
vmeter sleeve with battery pack and Raspberry Pi
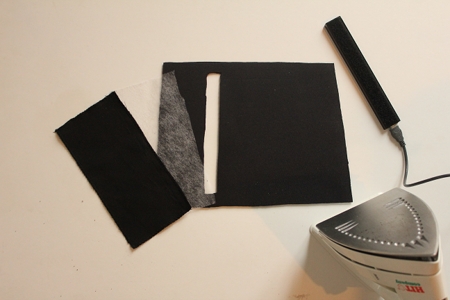
The materials we used for the sleeve were 3mm neoprene, adhesive velcro, a piece of stiff fabric, fusible interfacing and metal snaps (not in the image). The neoprene was here cut into a trapezoid shape with the lower width being about 27cm and the upper width being about 24cm, the height being about 19.5cm. The cut for the vmeter is about 1-2mm smaller at each side then the vmeter.
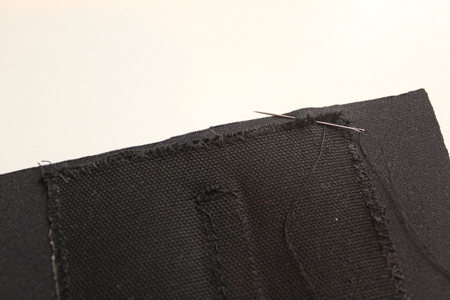
The seamed stiff fabric is ironed to the neoprene with the fusible interfacing in between. The fabric prevents the neoprene from bending away from the vmeter and provides a base for the vmeter. The interfacing sticks usually not very well to the neoprene, so one should in addition hand-stitch the fabric to the neoprene in a way that the stitch is not visible from the other side. Leave some space for the vmeter-plug (the plug goes underneath the neoprene).
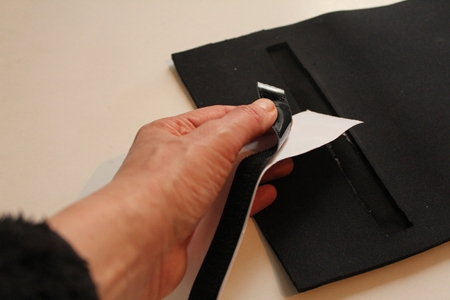
I removed the interfacing before attaching the velcro, but that's probably rather a matter of taste since anyway the velcro needs to be sewed to the neoprene (you can see the seam of the velcro stitch in the previous image).
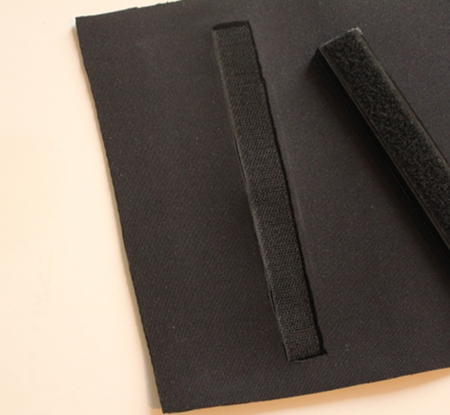
An image of the velcro on the sleeve and on the vmeter. Attach the metal snaps and you are done.
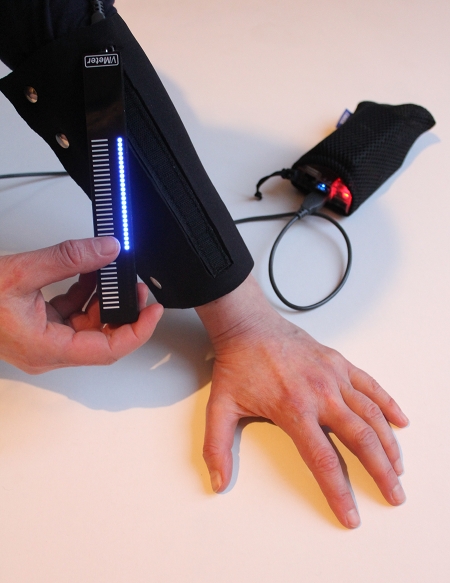
With the Raspberry Pi and the battery in a little pocket the result is a wireless solution for fixing the vmeter to an arm (observe that the small Rasberry Pi model A with USB hub is another smaller option). Moreover due to the velcro the vmeter might be easily detached from the sleeve and used for other purposes. The above described set-up can be watched in action in the following video:
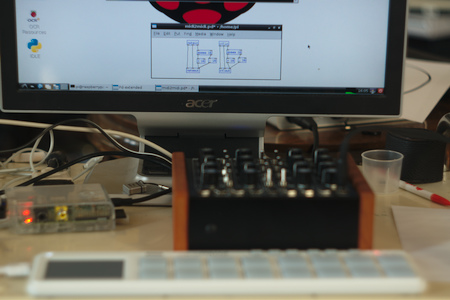
(a nanoPad controlling a Dark Energy 2 without a computer inbetween - well with a computer inbetween but a small one)
Here is a simple pd-patch for that just cross-connecting two MIDI interfaces. It is almost trivial, once you know that pd just keeps counting the MIDI channels cross the interfaces (i.e. first interface provides channels 1-16 inter faces two will be addressed by channels 17-32 etc.).
Or with a USB-MIDI-interface (the cable ones for example) you can get functionality similar to a missing link.
However, there is still one thing missing: A save way for powering off the system. While in most cases just pulling the plug will do nothing bad, it might in very rare cases happen while the system is writing to a log file or something and in even rarer cases some of that data gets lost (but the filesystem recovers due to the blessings of journaling) and then in the most rare of rare cases the poweroff happens while the card's controller is fiddling with its FTL (flash translation layer) and the card gets unreadable. So, in short, on either needs a poweroff button that shuts down the system or one should protect the filesystem in other ways. A nice way for option two is to make the filesystem (fs) behave like the live file systems on CDs. The filesystem is a union of a read-only system on the card and a tmpfs (in memory) for alterations to it. This way nothing gets written to the card and any file written will be lost after reboot but since our system does not need to write anything anyway (and has no need for any persistent state) this seems to be the way to go. One should be able to follow the instructions here but I have not yet done so (mind you this should be made after all the settings are final).
Maybe an archlinux with faster boot time and a small handcoded programm for the midi-osc bridge will do better in the end but for now I like the ease of adapting the setup by just repatching things in pd.